One of the problems with getting feedback on your manuscript is overwhelm. If you’ve got five Word documents floating on your computer somewhere, it can bring your revision process to standstill.
This post is about the simple way I keep track of valuable feedback from my critique partners.
This TAME YOUR REVISION series started over at The Winged Pen.
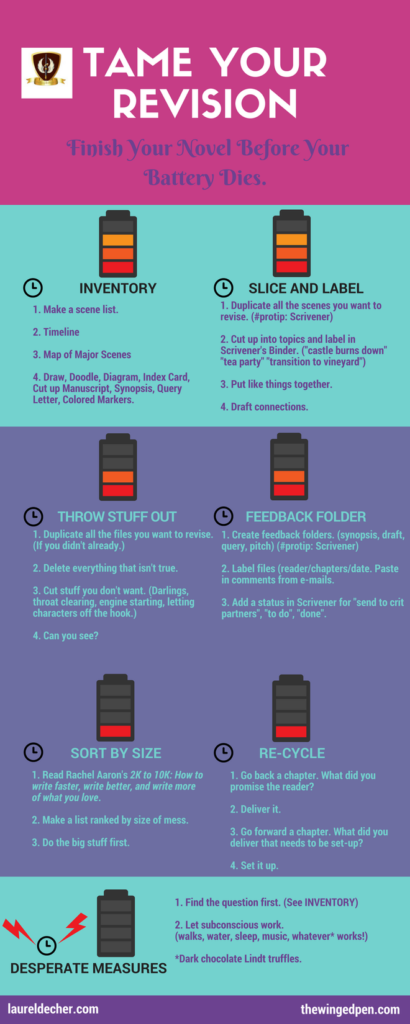
Here are links to the individual posts:
- Inventory
- Slice and Label With Scrivener
- Throw Stuff Out–There’s no separate post for this one. Everything I have to say is on the infographic. 🙂
- Feedback Folder
- Sort By Size
- Re-Cycle
- Desperate Measures
You can download the infographic.
My earlier post about SLICE AND LABEL was unexpectedly popular. So here’s the second post in my how to manage your revision process with Scrivener. Hope it’s useful!
If you’re not a Scrivener fan, you can use your organizing tool of choice. And share your tips in the comments if you feel so inclined.
Here’s how I use a FEEDBACK FOLDER in Scrivener:
- Create a place for feedback in Scrivener’s Research folder. When you open a new file in Scrivener, you have a Manuscript folder and a Research folder. I put feedback in the Research folder because I don’t want these “words” included in my manuscript word count. Click on the folder name and type to re-name it. I call this folder FEEDBACK. (Brilliant, no? I told you this was simple.)
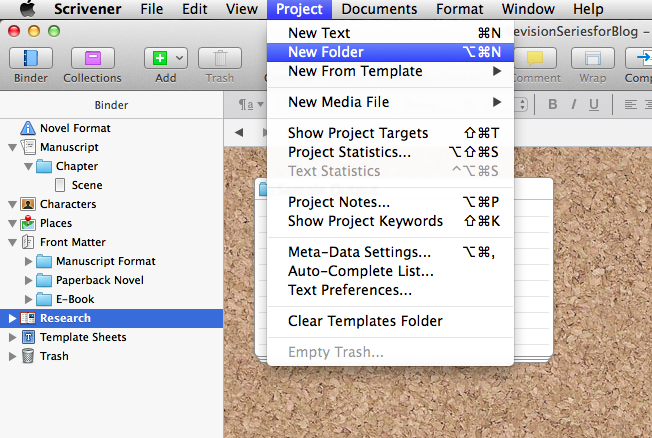
2. Click on the FEEDBACK folder and create a few subfolders. I have SYNOPSIS, DRAFT, and QUERY because I work on each of those separately. You could have one for PITCHES too.
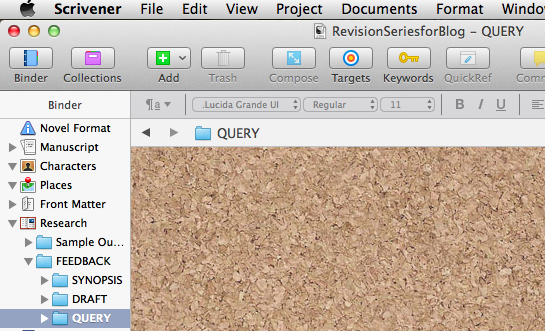
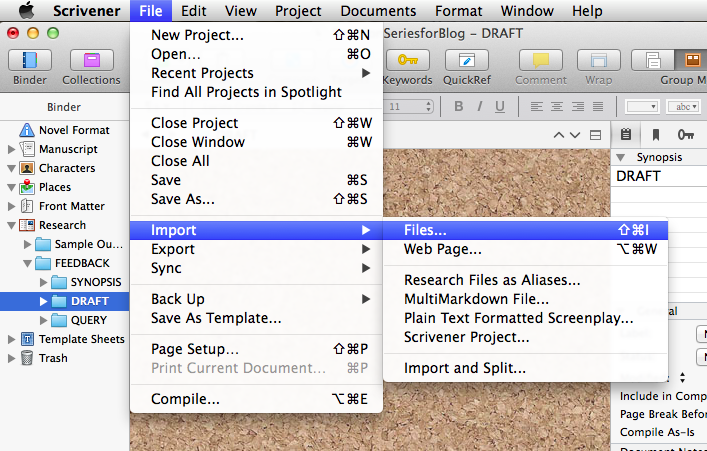
3. Import Word* files with feedback and label them with critiquer’s name and date. This way I know at a glance who has seen what even if I fall into a revision hole for a while. Critique partners’ time is valuable. Don’t want to waste it.
(Don’t toss the original files yet until you decide if you like reading the feedback from within Scrivener. The comments can get kind of small.)
My crit partners are very kind and also send me general comments via e-mail or Twitter. I paste these into the file so all their insight is in the same place. (I know–not rocket science. Took me a while.)
*Or whatever form your feedback arrives in. Physical objects don’t work well, so save any tomatoes for salsa.
4. Flag the feedback you want to re-visit. Here you see my current draft and a long list of files that represent the hard work of my critique partners. On the right-hand side you see the Inspector panel. (If yours looks different, go to View–Inspector–Synopsis. Then click on the blue circle with the i on it in the upper right-hand corner.
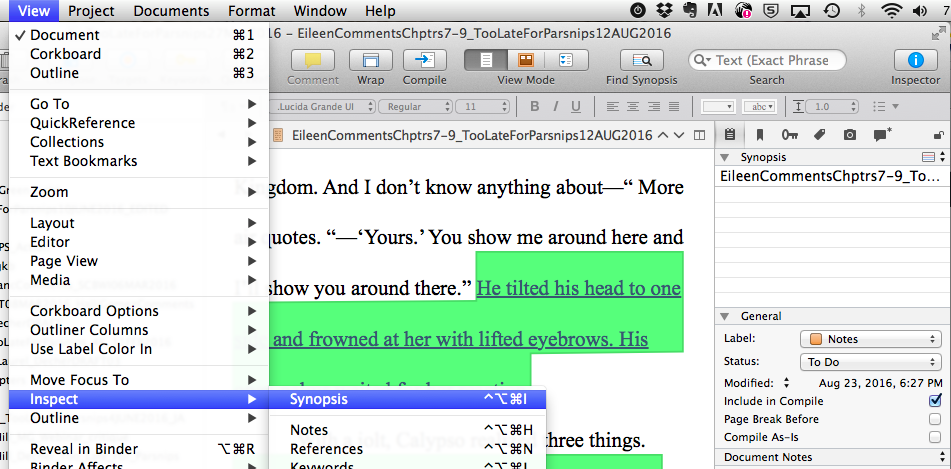
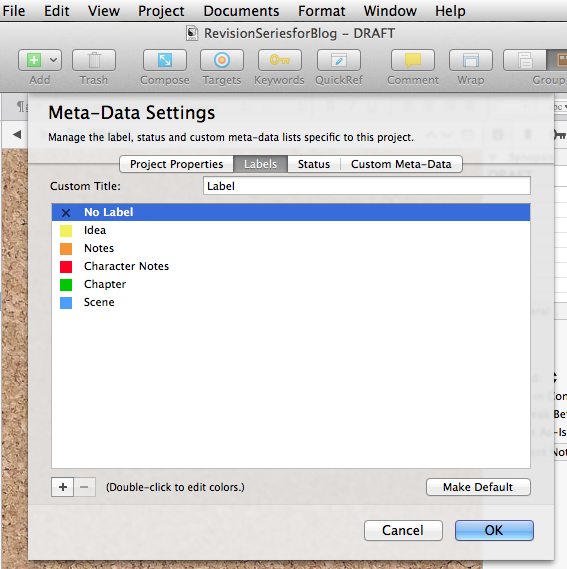
5. Pick a color. Click on the drop down arrows next to the Label field, Scrivener will let you pick a label or edit to create your own. Double-click on the color to change it.
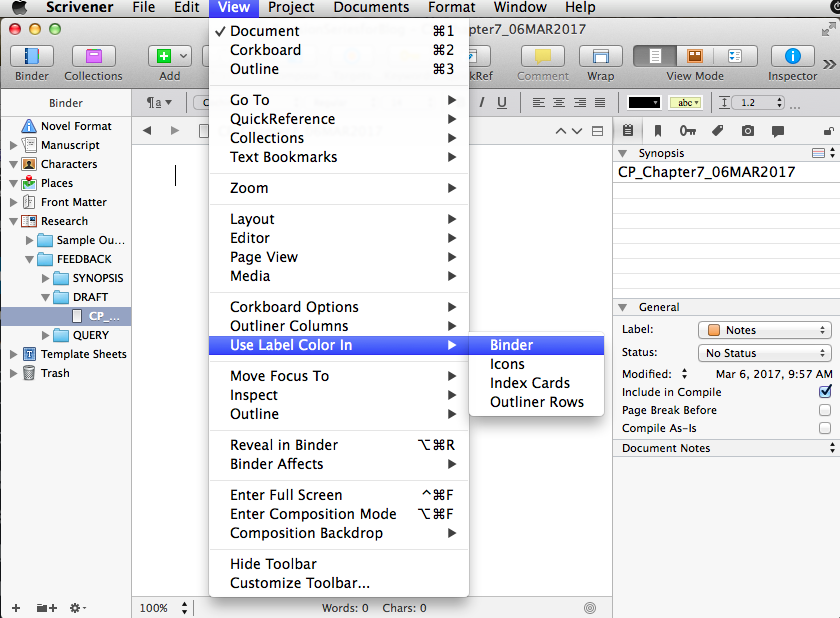
6. Make it really obvious. Scrivener lets you change the color of the file in the Binder so you can easily see what feedback you want to re-visit.
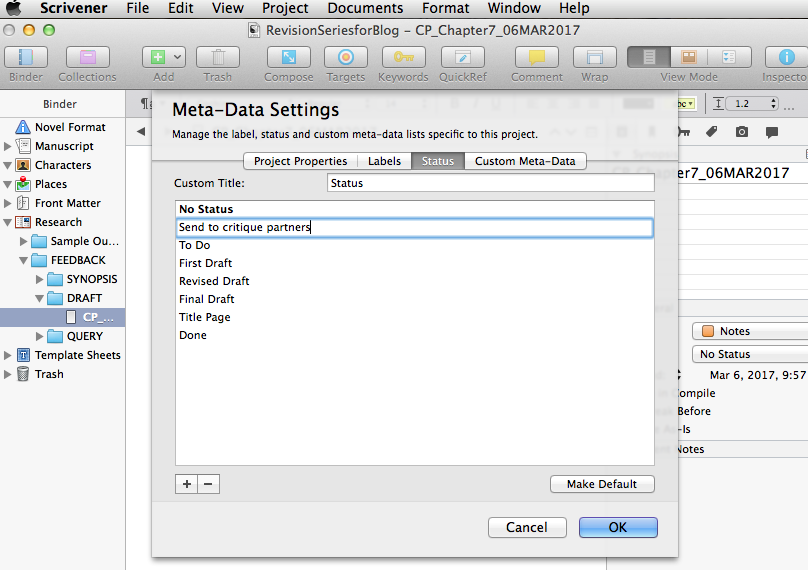
7. Motivation and Status. Click on the Status arrows to choose a status. Scrivener’s existing Statuses are handy. I like concrete labels like: “Send to name of critique partner” or “Posted on Wattpad.”
*FYI, Scrivener’s Status menu doesn’t let you color code, so I use it for things I want to know when I’m “in” the file. If you need color, use the Label menu.
There you are, a shiny new FEEDBACK folder and a game plan for your revision.
Happy Revision! Let me know how it goes!
If you’d like to see the SLICE AND LABEL post, click here.
Save
Save
Save
Save
Save
