This is the third post in a short series on preparing for National Novel Writing Month. The NaNoWriMo site no longer exists, but you can sign up for Novel November. Or build your own challenge with some writer friends.
Dan Wells’ 7 Point Structure video lectures are helping me so much that I’m squeezing in an extra blog post to help writers getting ready for National Novel Writing Month. Dan’s five lectures are only ten minutes each and well worth watching. If you watch them first, this post will probably make more sense.
Or feel free to get a taste of why I got excited about these videos by reading my post first. NaNoWriMo season is all about finding out whatever works for your writing process. Take your time playing with this. A little bit here and there is perfect. Enjoy!
Save
Save
Save
Save
Save
Save
Save
Save
Save
Save
Save
Save
Save
Save
Save
Step 0: A present for you
Step 0: Optional. Markers and real index cards work too. I’ve got a little present for you: A plotting template. Yay! Read the files in Word or import them into Scrivener for future use (see bottom of post for how to). Download the files from Dropbox.
Note: You don’t need a Dropbox account. Just click on the tiny blue print that says “No thanks” and Dropbox will give you the files.
Save
Save
Save
Save
Save
Save
Save
Save
Save
Save
Save
Save
Save
Save
Save
Step 1: Import or Type up the 7 Point Structure
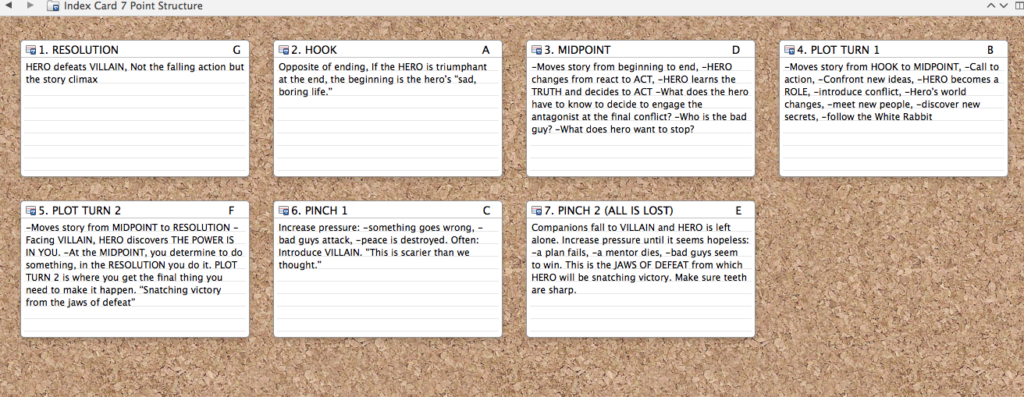
Step 1:Import or type up the 7 Point Structure in Scrivener or in your software of choice. A simple table will work fine. The numbers on each card are the order Dan uses in the video to figure out the plot points. The letters on each card are the order the plot points occur in the story. I typed up his tips on each card to help myself through the process.
How to use the index cards: Start with the ending of the story (RESOLUTION). The RESOLUTION isn’t the wrap-up here, it’s the thrilling final victory or defeat.
The opposite of the RESOLUTION is the beginning (HOOK). The MIDPOINT is the half-way point in the story between the HOOK and the RESOLUTION. After that, it’s a repeated cutting the story in half, like cutting brownies in a pan.
Save
Save
Save
Save
Save
Save
Save
Save
Save
Save
Save
Save
Save
Save
Save
Scrivener Index Cards for the 7 Point Structure described by Dan Wells.
Congratulations! Now you have an overall shape for your story. That will help a lot during NaNoWriMo, even if it changes while you write. If you’re anything like me, it will. Feel free to stop here. Letting your story grow in your subconscious makes it much easier to get the words later on.
Step 2: Repeat the Process For Each Story Thread
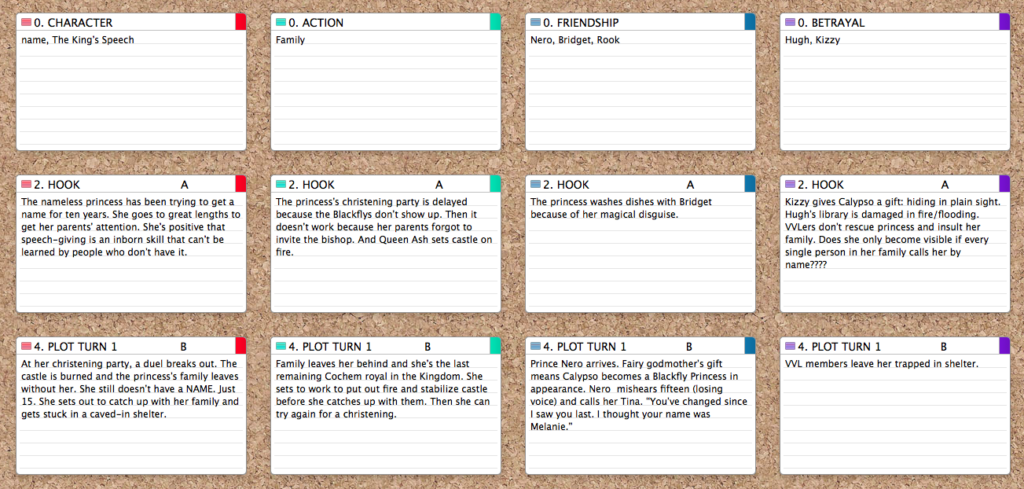
Step 2:If you’ve got more story ideas that need a home, you can repeat the process above for each story thread. Dan Wells’ video uses CHARACTER, ACTION, FRIENDSHIP, BETRAYAL. (I changed the ROMANCE category to FRIENDSHIP because I write Middle Grade.) I put a few key words under each thread to jog my memory. It’s easier to do this across all the threads, i.e. the RESOLUTION for each thread, followed by the HOOK.
Cut and paste the different threads from your overarching 7 Point Index Cards and add more where you need it. Remember that all the HOOKs don’t have to happen simultaneously.
Be gentle with yourself. If you’ve got blank spaces or you can’t figure it all out at once, go away and come back later. You’ve got a whole month to play with this. Joy is key.
Save
Save
Save
Save
Save
Save
Save
Save
Save
Save
Save
Save
Save
Save
Save
Using Scrivener cards to lay out a multi-thread story using Dan Wells' CHARACTER, ACTION, FRIENDSHIP, BETRAYAL.
Step 3: Sort Cards Into Story Order
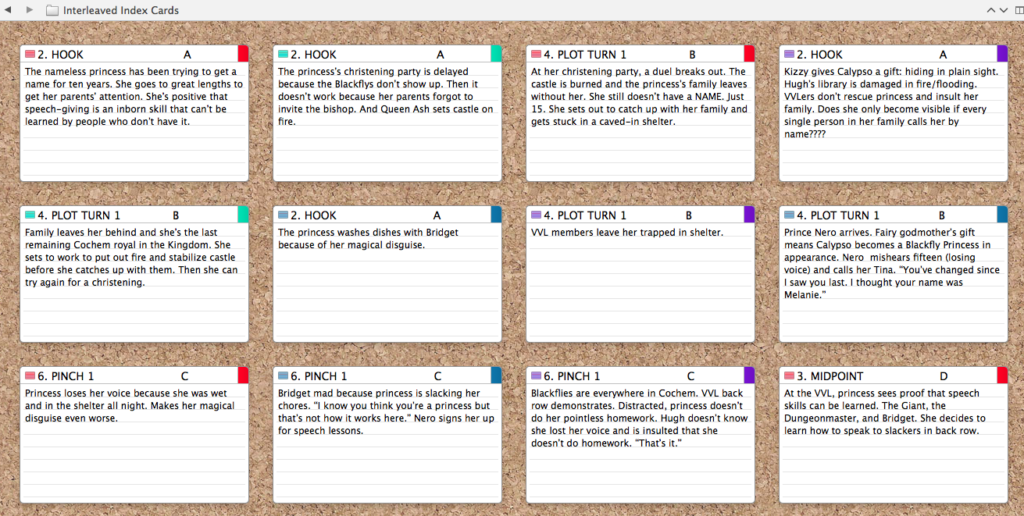
Step 3: If November still hasn’t arrived (or if it has and you’re taking a break from the words), you can sort your index cards into chronological order. Now you have a handy scene list to write from. Since 7 x 4 is 28 :), you now have an index card for each day of the writing month. And two “free days” for catching up. Well done!
Save
Save
Save
Save
Save
Save
Save
Save
Save
Save
Save
Save
Save
Save
Save
Index Cards for 7 Point Structure sorted into chronological story order.
Step 4: Extra credit with Try/ Fail Cycles
Step 4:Try/Fail Cycles for Extra credit. Dan Wells talked about the power of Try/Fail Cycles. Add some to the middle of your story, right around the PLOT TURN 2, and get your readers to cheer for your characters.
Adding try/fail cycles with Dan Wells' 7 Step Plotting system in Scrivener.
Download the templates
How did it go? Did you try Dan Wells’ 7 Point Story Structure? Do you have a good feeling for your story now?
Happy writing!
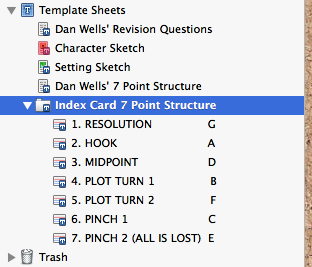
Download the templates files from Dropbox .The Template Sheets folder in Scrivener is inside your current project. Drag the files into the folder and they magically become Template sheets. Look down at the bottom of the Binder and you should see something like this:
Screen shot of Template Sheets folder in Scrivener's Binder showing location right above Trash.