This book isn’t finished yet. It’s getting a shiny new cover–with your help–on Kickstarter. What’s Kickstarter?
Making a tiny book come out correctly is a bit tricky! Here’s how I finally got the pages to print in the right order for the first book in my series for ages 9 to 12. If you are interested in a bit of amateur bookbinding, you might enjoy the challenge.
Why a Tiny Book?
In Germany, bookstores have a long history of giving away “Leseproben” or reading samples.
These are usually small booklets with the same cover image as the book.
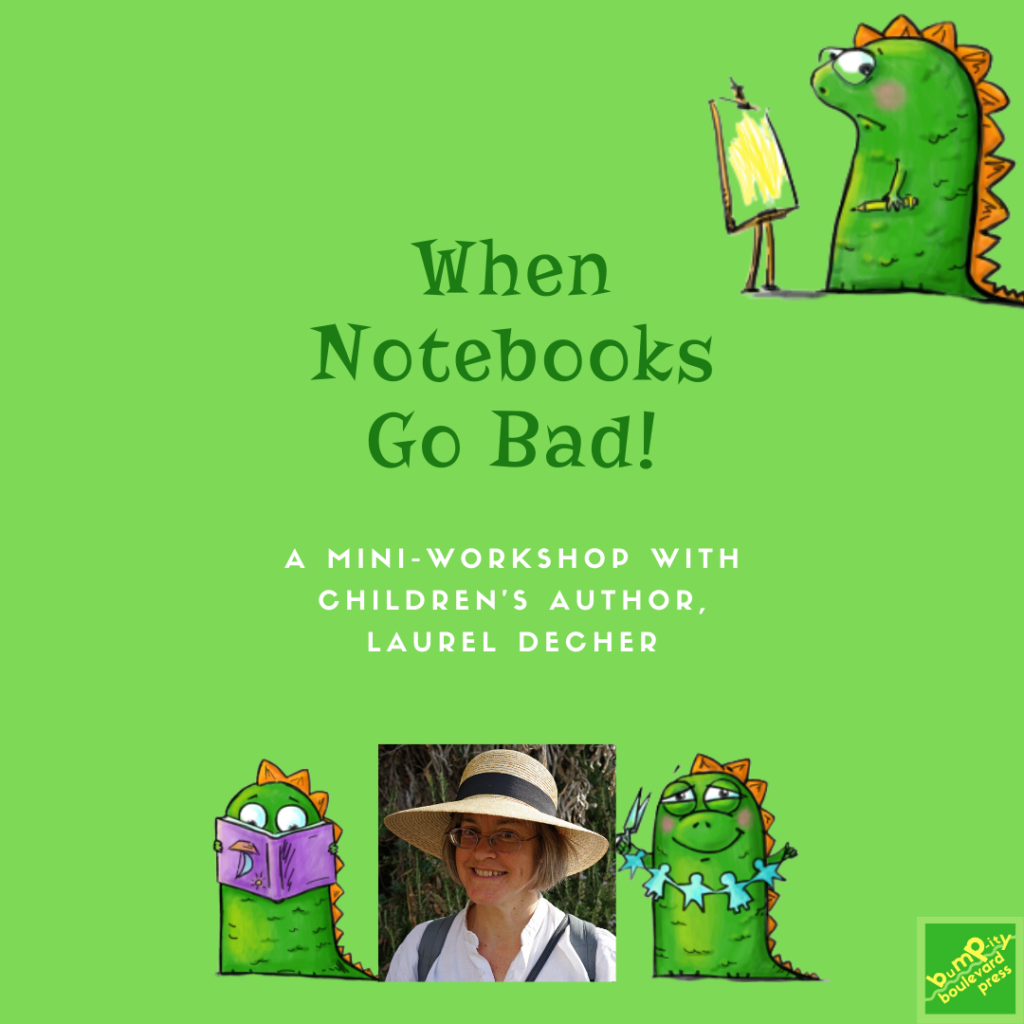
While working on my When Notebooks Go Bad workshop for kids, which includes binding a small booklet, I decided to create a “Leseprobe” for one of my books.
What You Need
To create a tiny book, you need:
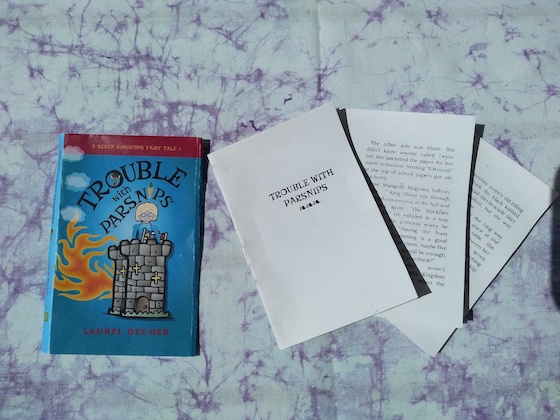
Print quality PDF of interior text for the full-sized book. (My book is 6×9 inches.)
Print quality cover file (At least 300 dpi, CMYK color profile, fonts embedded, for print.)
I use LibreOffice to create my print quality PDF files, so I made the following changes in the LibreOffice file (.odt) before exporting as a print quality PDF.
Created a book sample with front matter, chapter 1, and back matter. (Deleted all other chapters.)
Increased font sizes for Contents (15 pt), Text (18 pt), and Chapter One header (14 pt), and page numbers in footer (20 pt).
Deleted page headers.
Reduced both inner and outer margins to 0.75 inches.
Fold A Mock-Up
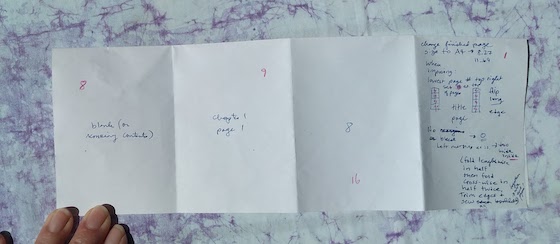
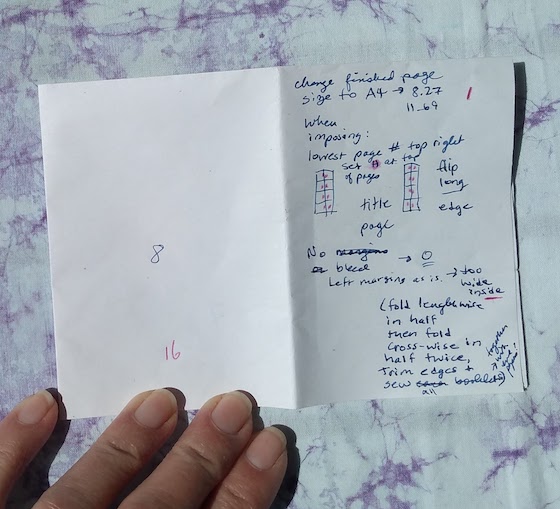
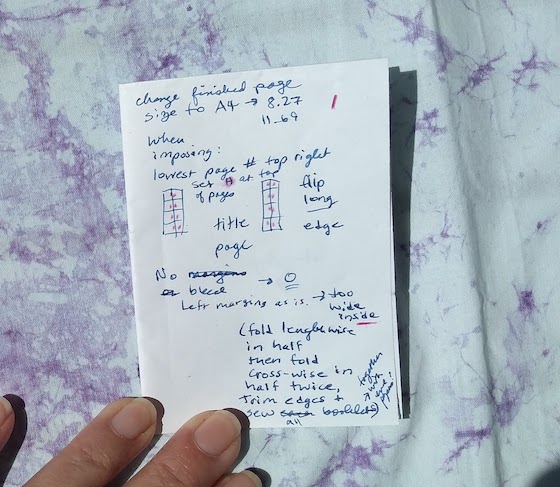
You have to keep track of HOW you folded your paper.
Mark the top and remember to consistently flip the paper lengthwise. it’s going to be double-sided, and you have to tell your printer how to flip the paper.
I started with A4 (would probably work almost the same with US Letter) and folded it lengthwise once and then crosswise twice to make a tiny booklet. It all seems very simple, until you start printing out your book and the front matter pages are numbered differently than the text. 🙂
If your sample has more than 16 pages, including the front and back matter, you will need more than one page.
I used 3 sheets of A4 paper for my single chapter sample. (A4 is only approximately U.S. Letter size).
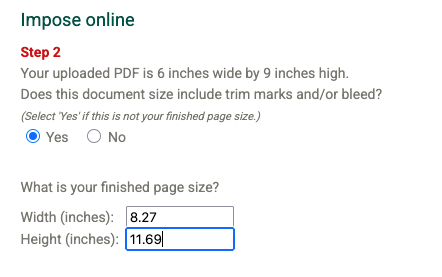
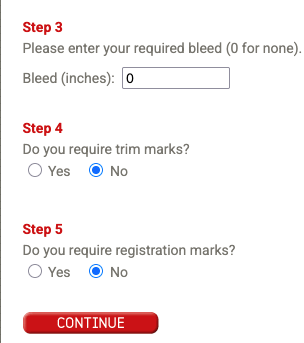
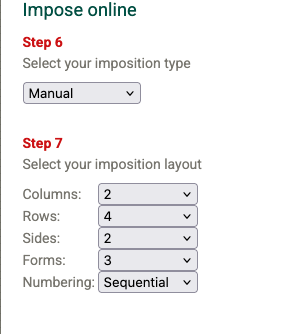
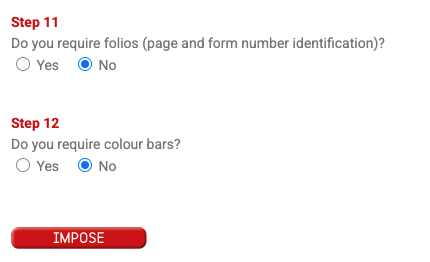
Here are the settings I used on the Impose Online website:
Set finished page size to A4, 8.27 x 11.69
I chose 0 bleed and No for the extra options.
For a 16-page mini-book, I chose 2 columns, 4 rows, 2 sides, and 3 forms (choose however many 16-page forms you need to meet your page count.)
Now we layout the tiny pages . . .
I wasted a lot of paper figuring this out. If you choose a different number of pages, be gentle with yourself while getting this sorted. I recommend screenshots and labeling your printouts with whatever you changed.
You might need to be in the peaceful zone.
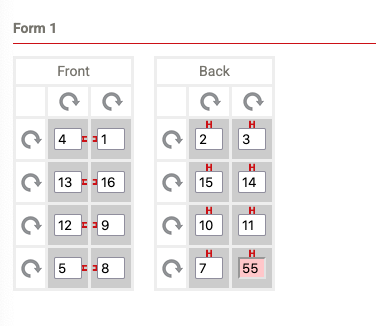
Here are the page numbers for the first 16 pages. Click on the top arrows to rotate the pages so they will be the right orientation when folded.
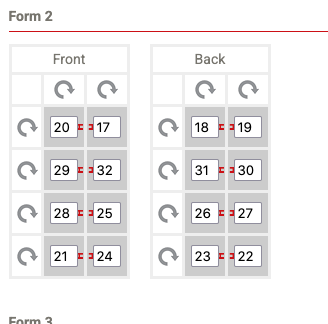
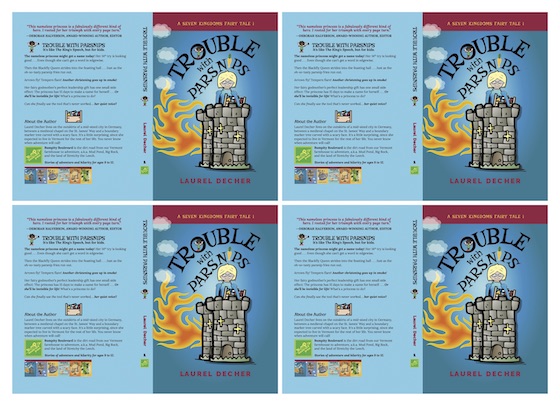
Here is the page layout for the next 16 pages of the booklet. (Front and back sides of the A4 paper. You can see that the pages have all been correctly rotated for this form.)
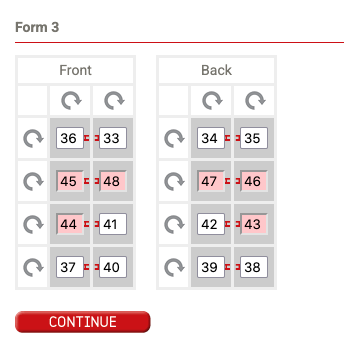
Here are the final 16 pages. The red highlighting means that Impose Online has no manuscript page for that spot. If you pick a page number higher than your page count, you will get a blank page in your tiny book.
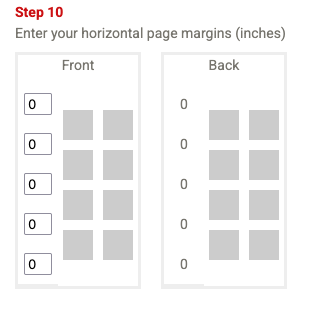
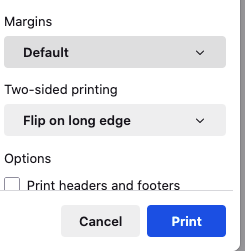
Choose the margins, but first . . .
Check your work before you hit continue.
After you hit the impose button, you can go back and do it again. Unfortunately, that means re-entering all of those page numbers again. This is why I have the screenshots to share with you :).
Impose Your File
Impose Online will take a few moments, then prompt you to download your file. Leave the window open, because you may want to do this more than once. LOL!
Print out the file, double-sided, flipped lengthwise. You might save paper by printing only page 1 + 2, even if you are absolutely positive that you have it all correct.
#justsayin’
The Test Fold
Consult your paper mockup and test fold your booklet. Trim the top, bottom, and sides so all of the pages open.
Are they right-side up? In the correct order? Legible?
Then you’re ready to stitch them all together.
Impose Your Cover
Now you can upload your color bookcover and impose that. If you have the file for your published book, you’ll already have something that works for printing.
I may play with the bleed and margin settings on Impose Online for the covers, to make sure there is enough extra to glue it all together.
When I finish the binding, I'll make a new post. . . Stay tuned!
In the meantime, you can checkout the preview for my mini-workshop, When Notebooks Go Bad, which shows kids all kinds of ways to train your notebook to behave!
Maybe you’d like to offer it at your school or library or bookstore or online . . . contact me and let me know.